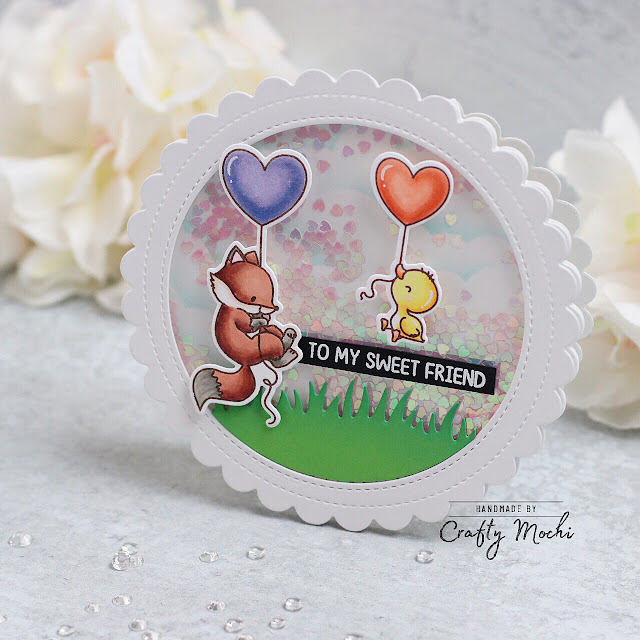
Hello friends! I wanted to try something new so I created my first shape card. I think it was a little tricky to make but I'm happy that it turned out alright.
To make my first shape card even more complicated I wanted to make it into a shaker card. I used the second largest scallop from Mama Elephant stacked circles and cut it twice on Neenah 80lb white cardstock. Then I used the largest circle to cut the window on one of the scallop circle. I adhered an acetate using liquid glue then add double sided foam tape. I found it was best to use a bigger circle for my background panel so I didn't have to line it up to the cut window. I used MFT A2 stitched circle stax from Bristol smooth cardstock. I inked the panel with broken china distress oxide ink and a cloud stencil. I adhered the background panel onto the other scallop (without the circle cutout). I placed some small hearts embellishment onto the center of the panel then remove the release paper from the foam tape with the scallop that has the acetate.
I stamped and colored images from Mama Elephant Up with love stamp set. It has four critters hanging on to heart balloons but I only used two on this card so I chose the sweet fox and duck. After coloring them with copic markers I cut them out using their coordinating dies.
For the grass I used MFT green room cardstock cut from the largest circle from ME stacked circles and MFT grass die. I white heat embossed the sentiment onto black cardstock and adhered both of the images with foam tape. For the card base, I used an A2 top folding card base from Neenah 110lb cardstock. I cut it with the scallop circle, slightly hanging the die off the scored edge which will create a hinge for the card base. I adhered my card panel on top and that finish off my card.
If I were to create another shape card I would have cut another scallop and score it at 1/4" for the base. I think cutting the 110lb cardstock was a bit hard because it's thicker. Also if you don't put a copy paper underneath the cardstock and you have worn out cutting plates like I do, you can see all the marks on your cardstock. I hope this post was helpful and it inspire you to create a shape card. Thanks so much for stopping by. Happy crafting!


No comments:
Post a Comment